SOP 5 Rigaku X-Ray Diffractometer
5.2 Warnings
- Only trained users can operate the Rigaku X-Ray Diffractometer (XRD)
- To become a trained user, one must complete the following
- Complete the radiation safety training provided by the CNSM safety office, which can be found at /Radiation Safety Training.
- Once radiation training is complete, the prospective user must contact Dr. Gredig or Dr. Gu to receive training on the XRD itself.
- Carefully read the entire manual before operation.
5.3 System Start Up
1 Sign your name in the log book /GWiki
2 Log the parameters that will be used - Time when system start up begins.
- What protocol will be used to age the x-ray tube.
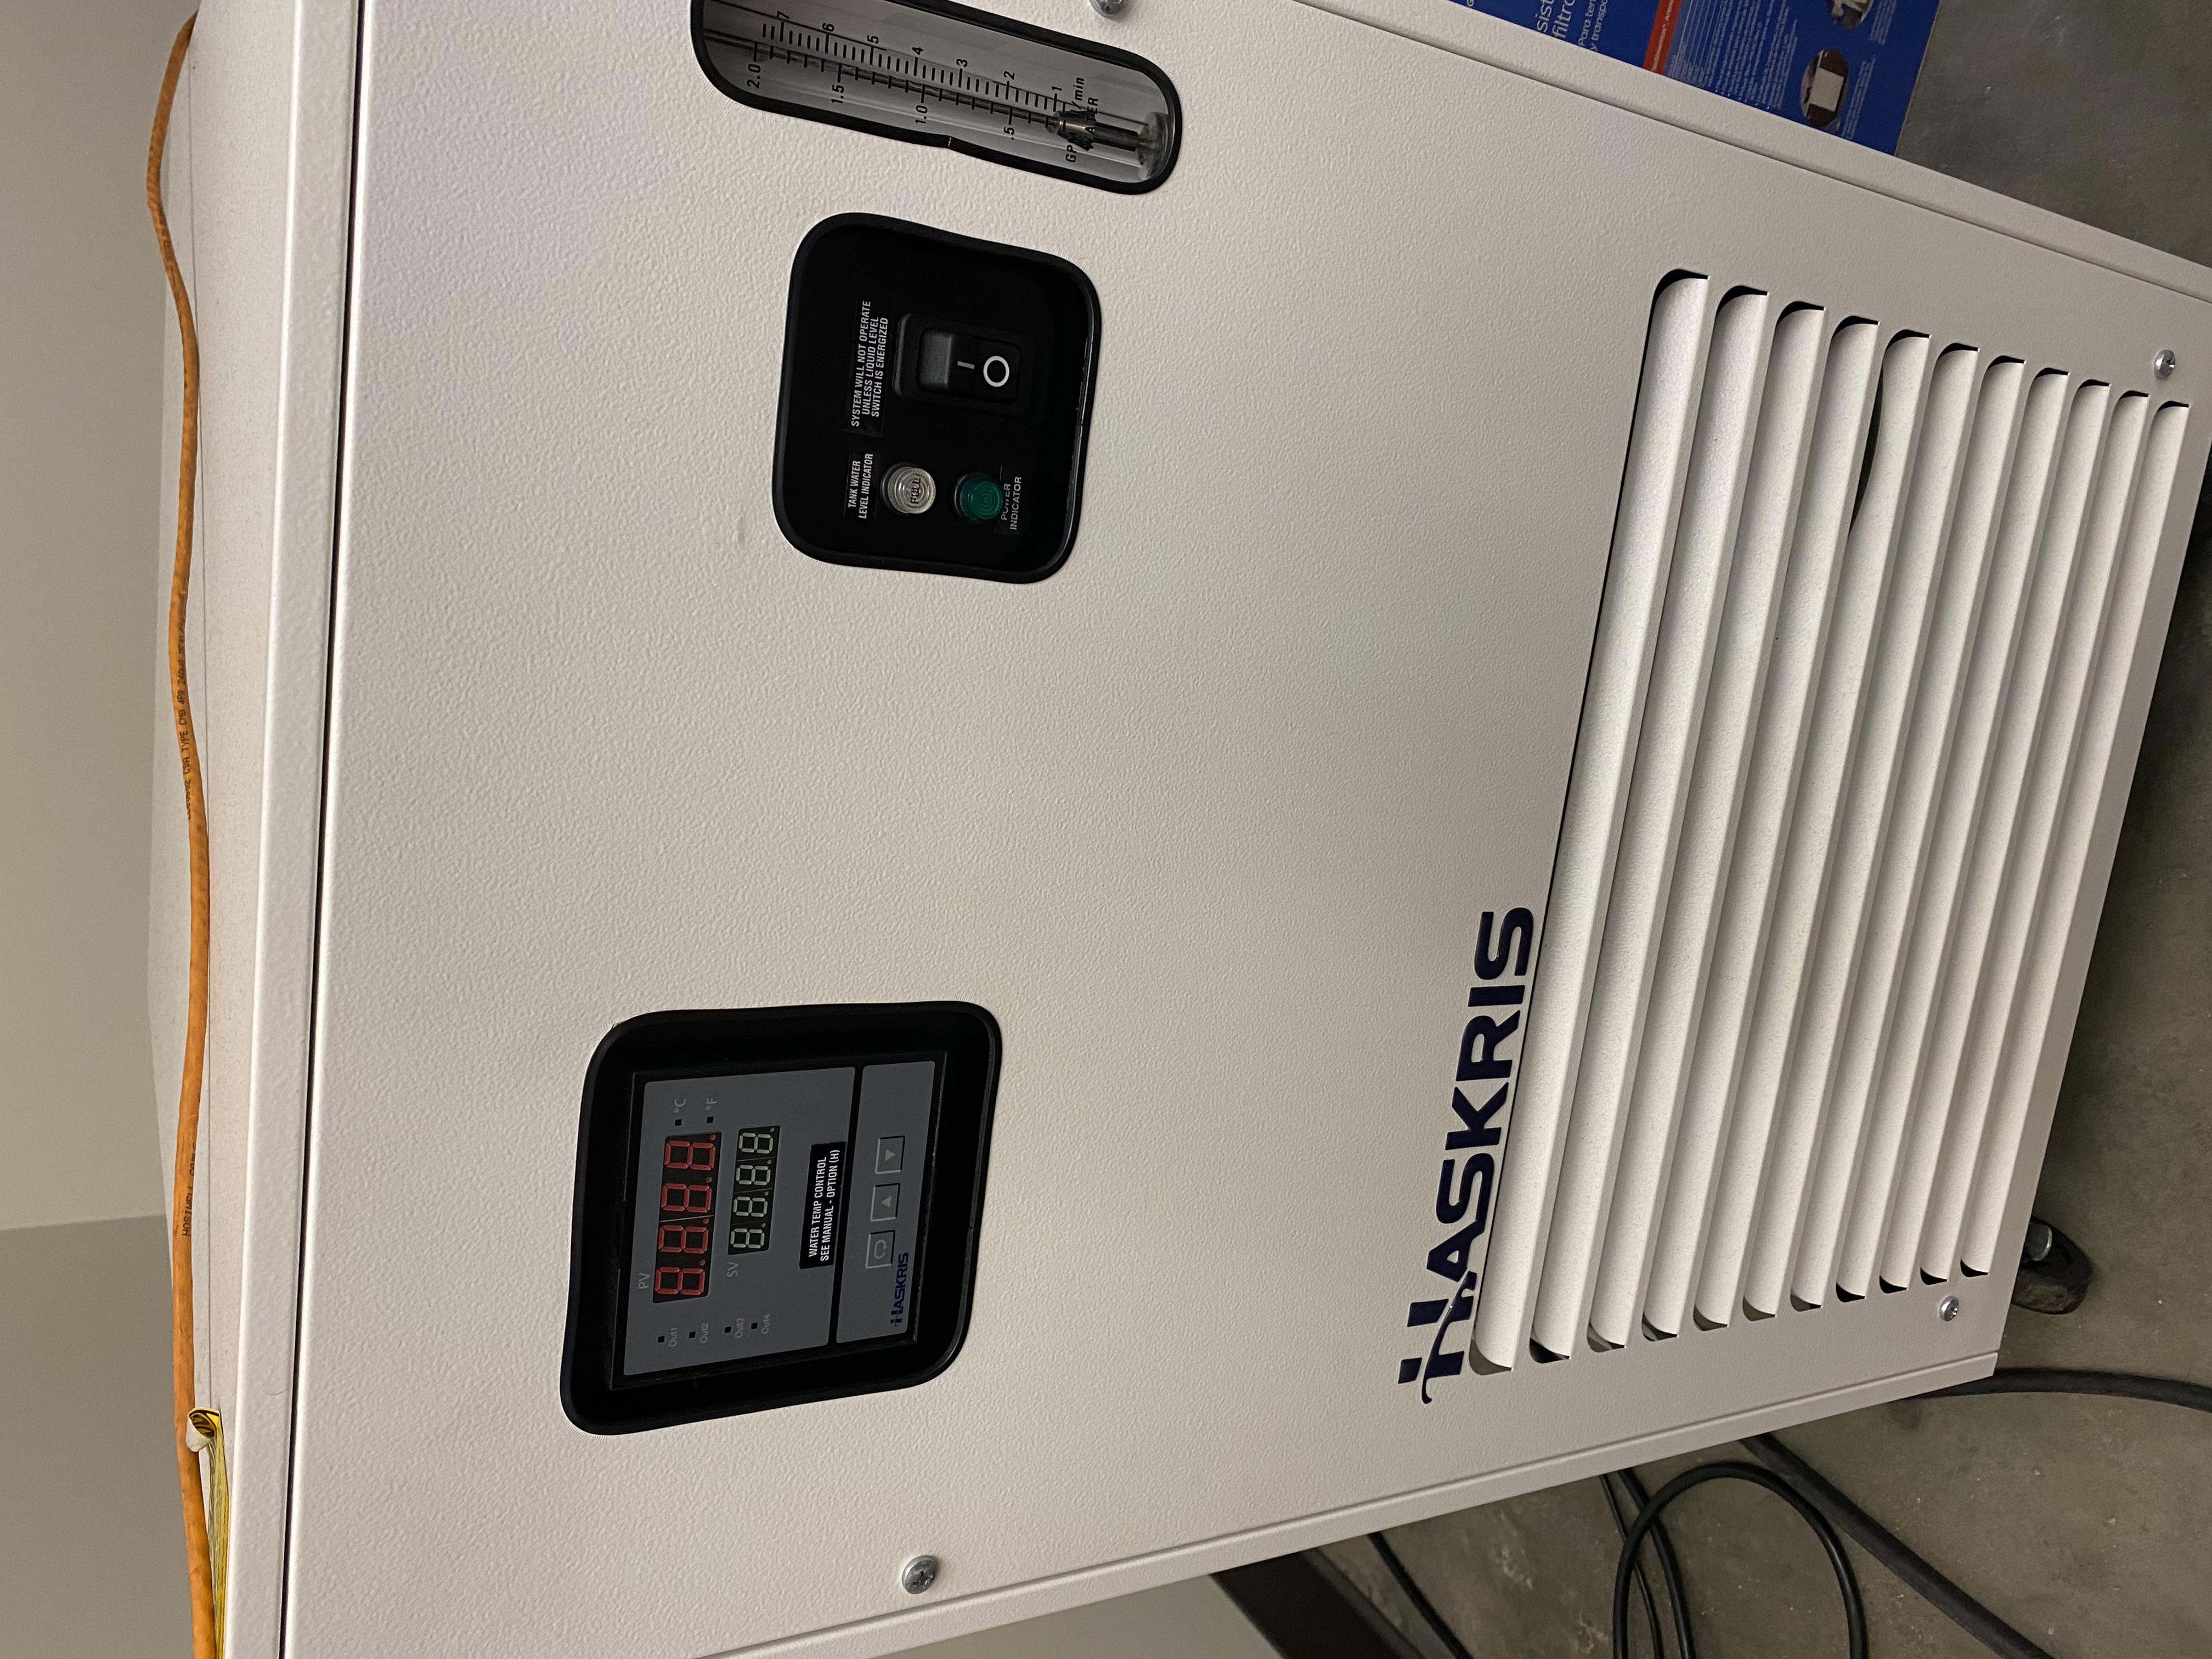
3 Turn on the Haskris Chiller using the I/O switch on the machine.
- Wait for the chiller to reach 60 C before continuing to the next steps.
4 The HV key is locked in a key lockbox attached to a handle on the cabinet nearest to the XRD.
- The password for the key lockbox will be provided during training with Dr. Gredig or Dr. Gu.
5 Insert the HV key into the slot labeled “HV enable” located on the front of the rigaku XRD.
- Turn the key clockwise to enable the HV.
6 Press the green button next to the key slot to turn on the XRD.
- The button will illuminate green and the system should power up.
7 Press the door lock to ensure that the rigaku XRD is locked.
- When the door is unlocked, an alarm will sound and the button will flash.
5.4 Powering on the X-Ray Generator using the SmartLab Studio II Sofware
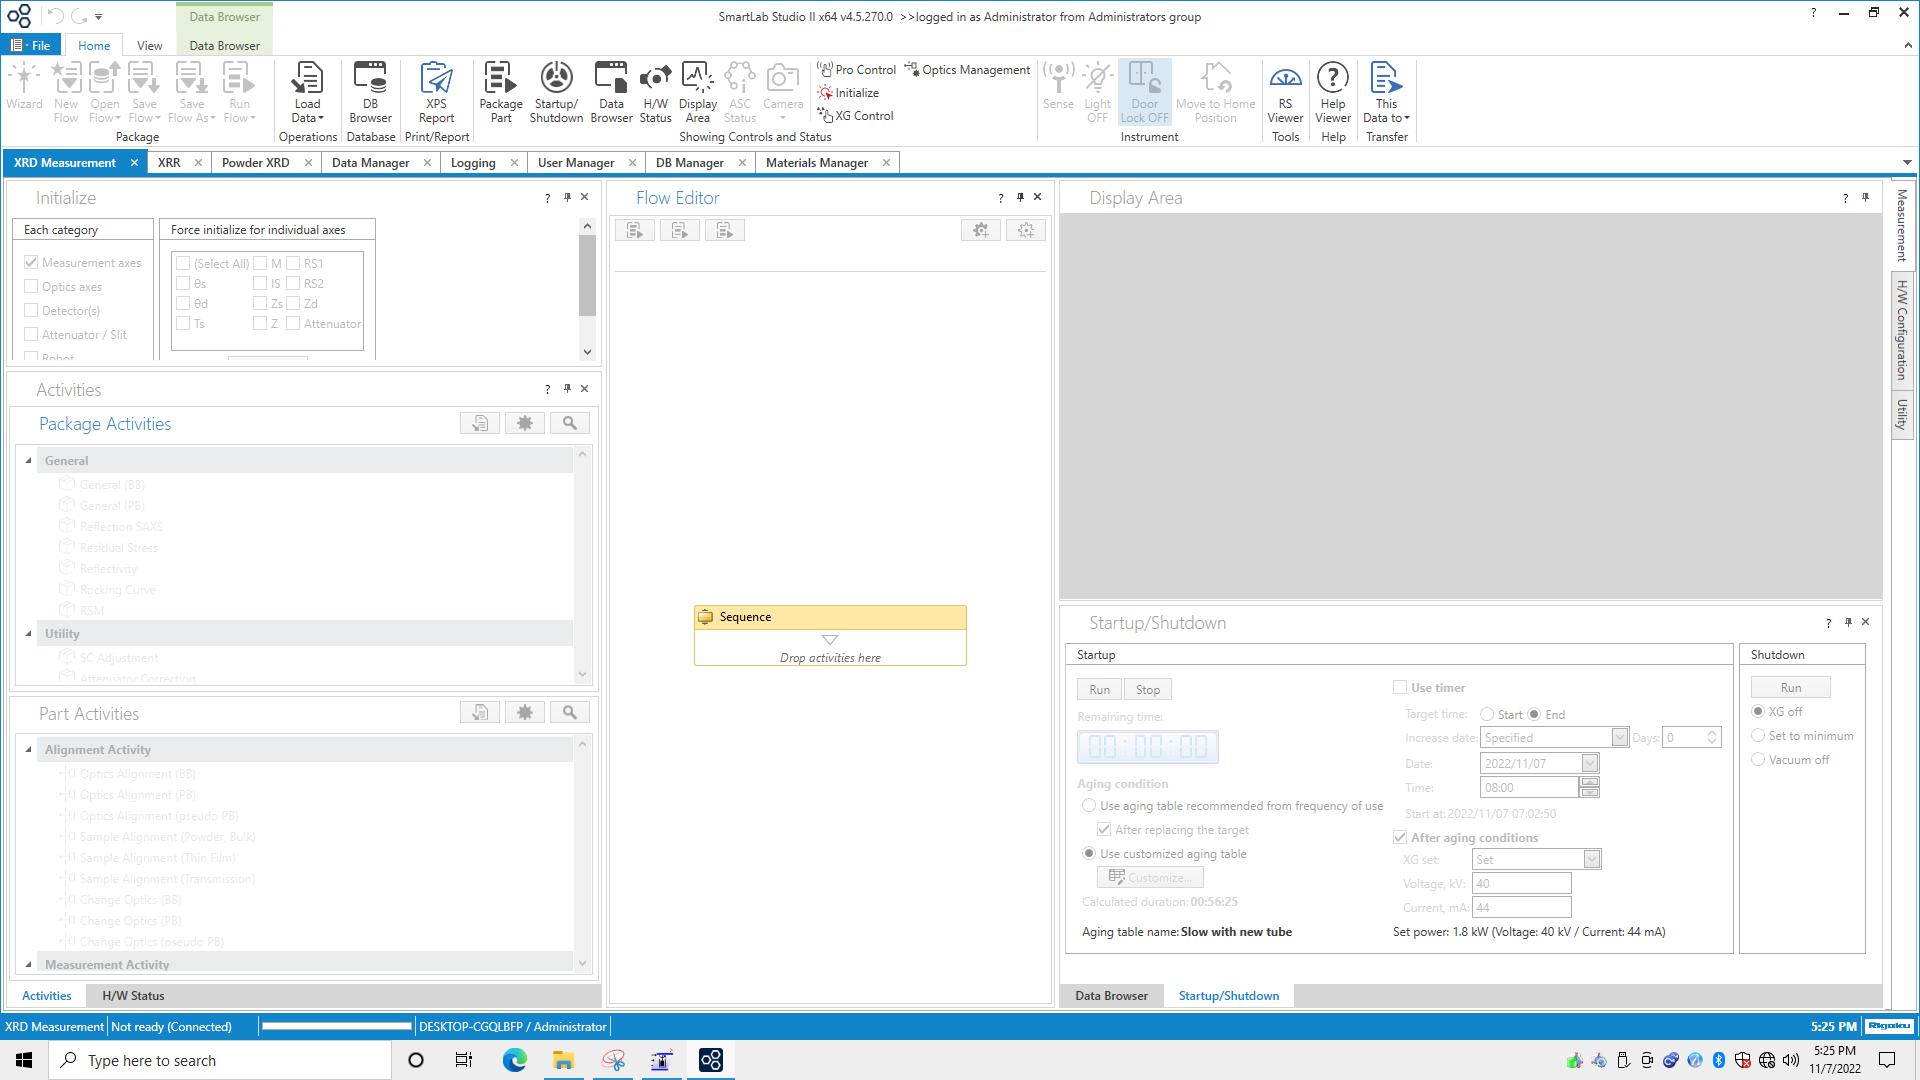
Open the SmartLab Studio II Software, located on the desktop of the computer 2 Locate the “Startup/Shutdown” procedure window in the lower right corner of the software window
The “Startup/Shutdown” protocol window may be grayed for about 5 minutes when starting the software.
5.5 Scanning Samples
5.5.1 Setting up and Running the Flow Sequence (Thin Films)
1 Once the aging process has been completed, we will need to perform the optics and sample alignment.
- The process outlined below will be for thin films. - The Thin Film Sample Alignment requires the PB filter.
2 In the “Flow Sequence Tasks” Window, click and drag Optics Alignment (PB) into the Flow Sequence window.
3 In the “Flow Sequence Tasks” Window, click and drag Sample Alignment (Thin Film) into the Flow Sequence window.
4 In the “Flow Sequence Tasks” Window, click and drag General Measurement into the Flow Sequence window.
5 In the “Flow Sequence Tasks” Window, click and drag Reflectivity Measurement into the Flow Sequence window.
6 The red exclamation marks symbolize where settings need to be changed in the flow sequence, typically a file needs a unique name.
Files should be saved in the “Gredig” folder located in the side bar of the file explorer window.
Make a new folder and name it with the date the scans are occurring.
Example: 20221107
Files should be given unique names in the form of YEARMONTHDAY_PROJECT_INITIALS_DATATYPE_SAMPLE_ADDITIONALINFORMATION.rasx
An example is: 20221107_EvaporatorCalibration_RM_XRD_SAMPLENAME_GENERALMEASUREMENT_01.rasx
The range of the scan angle, scan speed, and the scan division can be adjusted in the same menu when clicking on the “General Measurement” window.
A low resolution scan is 4° / min.
A high resolution scan is 0.5° / min.
7 Once all red exclamation marks are gone, press the “Start Flow Sequence”.
The on screen instruction will walk you through any changes needed to be made for the sequence to be completed.
The sample reference plate, sample holding plate are all located in the plastic drawer located under the desk the controlling computer is placed on.
5.5.2 Finishing Scans and Saving Data
- Once the scans are completed, check to make sure that all data is saved to the gredig folder.
5.5.3 Changing Settings to scan the same Sample in Between Scans
After a scan is finished the settings within the flow sequence can be changed so more scans with the same sample can be performed.
NOTE: Remember to change the file name after changing settings so that the previous scan is not over written. Also ensure that there are no additional red alerts before starting any additional scans.
5.5.4 Changing Sample
1 To change the sample, first make sure that there are no processes occurring in the flow sequence.
2 Check that the shutter is also closed by ensuring that the red indicator light on the left arm within the enclosure is NOT illuminated.
3 Press the “Door Lock” button on the front of the XRD.
- The alarm will sound and the door will unlock.
4 Remove the sample from the sample stage.
5 Replace new sample within sample stage.
6 Set up a new flow sequence and ensure that all settings are consistent with current sample.
- Attributes such as name, size, scanning angle range, etc will all need to be adjusted.
5.6 System Shut Down
1 The process of shut down will depend on if the next time the XRD will be used is within 24 hours or longer than 24 hours.
5.6.1 Next XRD Appointment within 24 Hours
1 Navigate to the “Startup/Shutdown” protocol window
2 Look for the “Shutdown” subwindow.
3 Make sure that the “set to minimum” option is selected.
4 Press “Run”
5.7 Converting Data to asc or txt file format
1 Located the “Rigaku.RasxDataConverter.v1.0.exe” program on the desktop and open it.
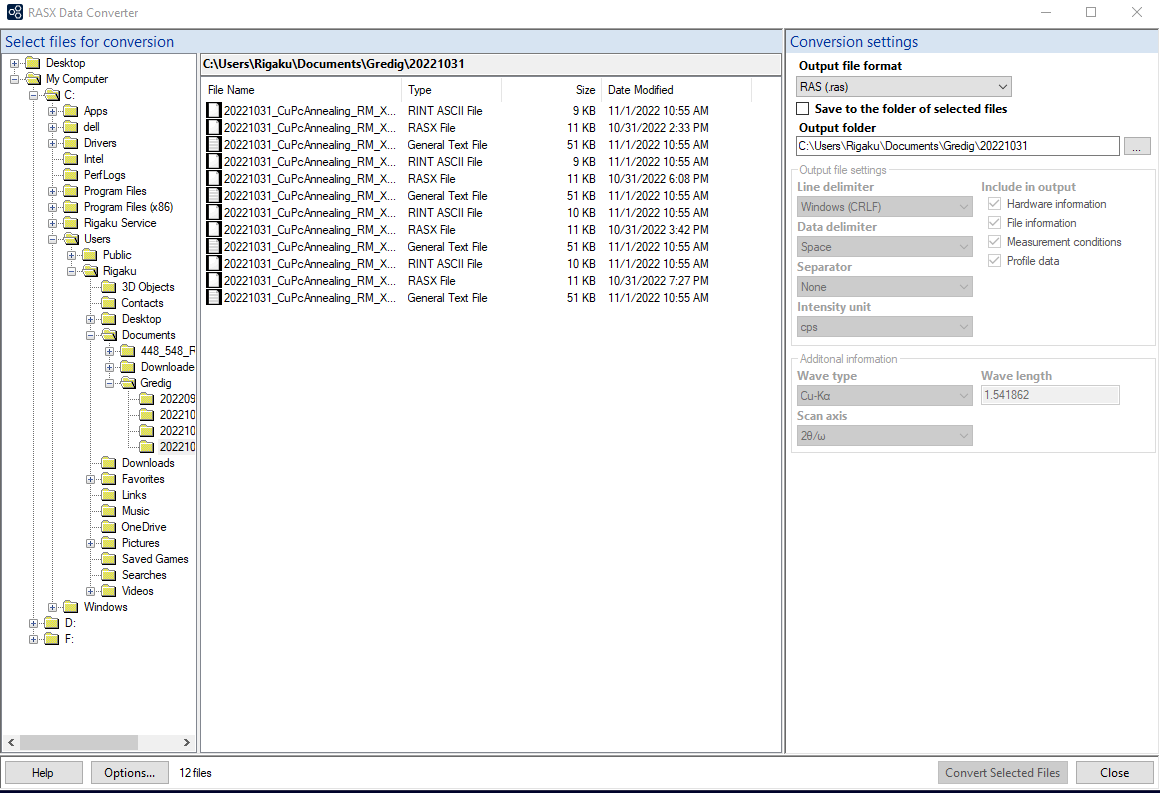
2 A window that looks like the image above should appear.
3 Use the side bar on the left to navigate to the folder that contains data to be converted.
4 Set the output folder to have the same file path as the input folder.
5 Click on the “Output file format” drop down menu.
6 Select “RINT ASCII (.asc)” or “General Text (.txt)” depending on what file format you want.
- The rigakuXRD R package by Dr. Thomas Gredig works well with the .asc file type but txt will also work.
7 Select all files that are to be converted.
- Multiple files can be selected by holding Ctrl and left clicking on multiple files.
8 Press “Convert Selected Files”